Wednesday, August 20, 2014

The Elsa Braid. Let's Start at the Very Beginning... of French Braiding.


If you already know how to french braid, then skip down to when her braid is complete.

1. The Elsa Braid

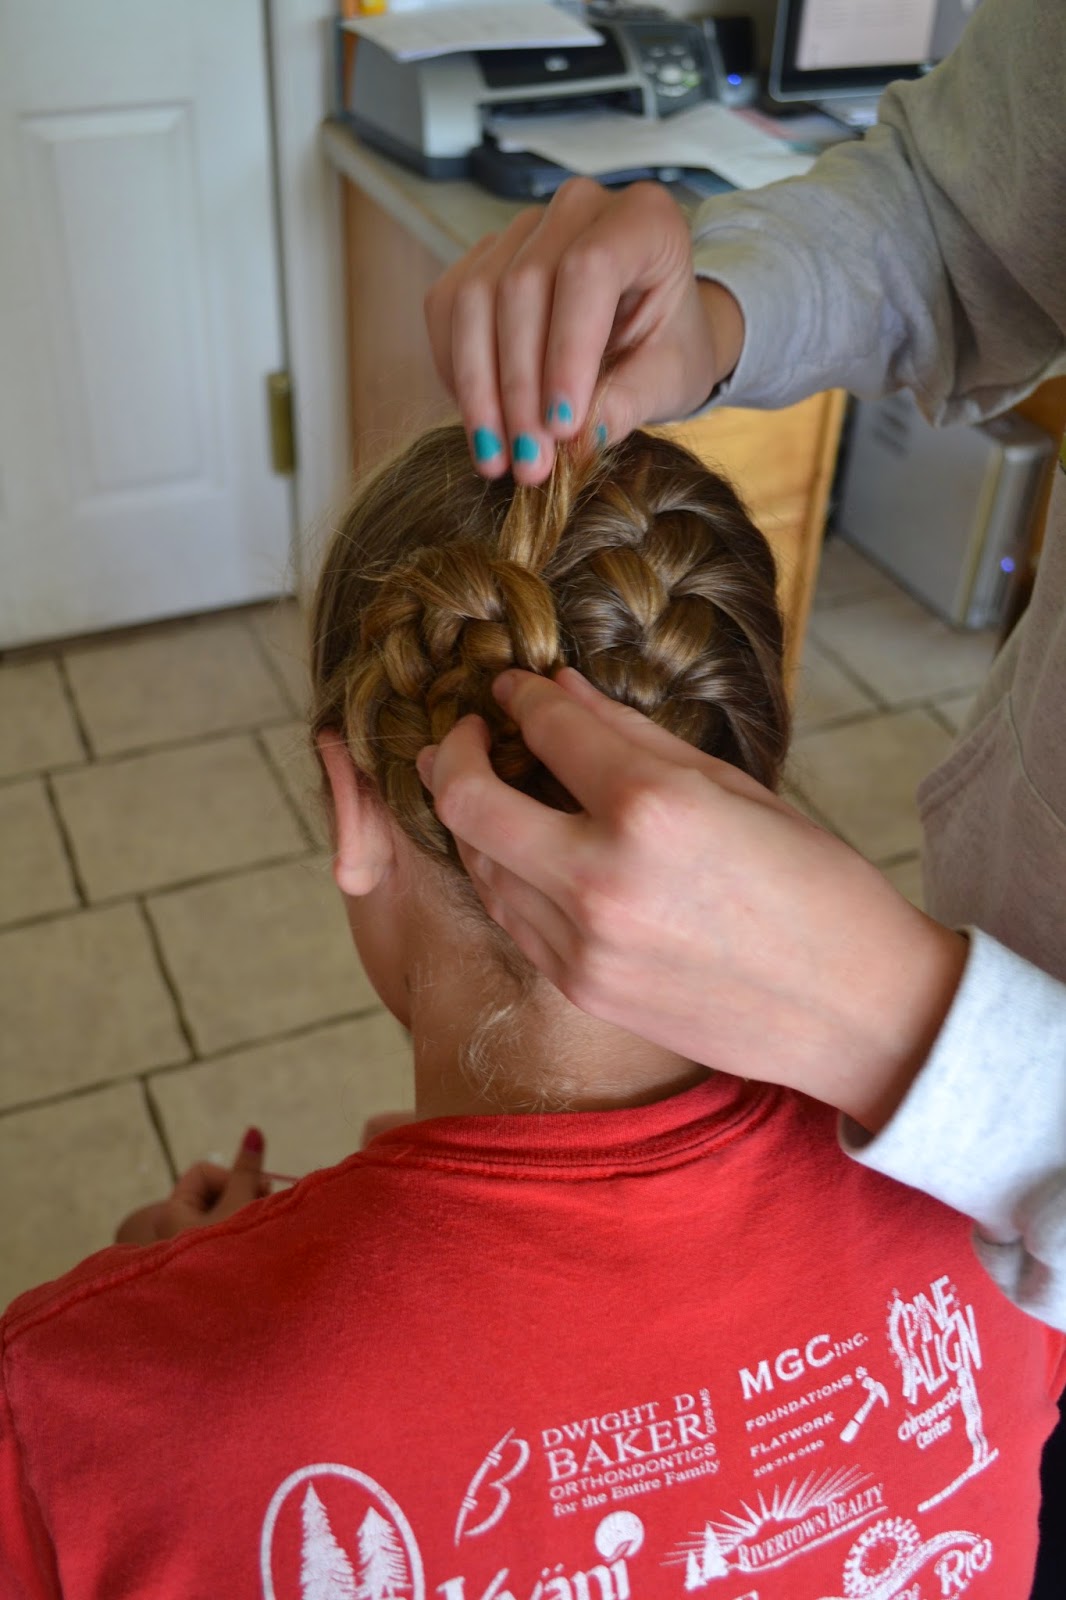
To start you divide the hair into three pieces starting at the bang area.  One of the reasons french braiding is difficult for some people is because they may not realize that you use all of your fingers to do this job.   So the right piece is held with the right index( pointer) finger and thumb.  The left piece is held with the left index finger and the thumb.  The middle piece is held with the right and left middle finger.  You braid like normal right over left and left over right once.

 While holding the left and middle pieces with your left index finger and thumb, you grab hair from the front right with your middle finger while holding onto the right piece
 with your thumb, pinky and ring finger. (This part is crucial to learn because you do this on the left and then go back and forth.  So if you can get this you got it.)


 Once the piece that you just grabbed is combined with the old right piece, braid right over left. Then repeat on the left.  If you want to brush the piece that you grabbed, then hold all of the pieces with your left hand.   The pieces are divided by the index, middle and ring finger.

 Next you hold the right and middle pieces in place with your right index finger and thumb.  You grab the next piece on the left from the front with your middle finger and pull it back to combine with your existing piece. Then it's braid like normal with left over right.

 Then repeat with or without combing or brushing as you go.
  Here is the finished product.  If you want this to look a little more Elsa, then start further back on her head or rat at the crown before you start and do it a little looser.
2.  Side Braided Bun

 This braid bun looks kind of like a flower and is very fast.  Annalisa wears this hair style a lot and does it on herself.  Whenever you see colored nails you know it's Annalisa doing the hair.
 It looks the best on the left.  So pull the braid up onto the left side and pull it around in a circle.
 Use a few pins to hold in place while you work it leaving the end out.

 Fold the end under and leave the end sticking out still. Pin a few more areas.

 The only downfall of the hair style is all the pins, but they are worth it.


 When if feels completely secure, tuck the end in and pin. 
 
The finished product
.

Saturday, August 9, 2014

Three Fast and Easy Hairstyles For Long Hair.

1. Ballerina Bun

Sometimes, we need a style that looks like their hair was done, but only takes a few minutes.  The first one is the basic bun without bobby pins.  This is done by pulling her hair back  in a high pony tail.  Because we have a lot of fuzziness in our family, we usually hairspray as we go.  If you wet down that helps also.  Then you twist the pony tail as tight as you can and wrap it around the hair band.  Then you take another hair band and secure  the bun.  It's OK if it shows like a messy bun.  The ends can be tucked in or left out, whichever you prefer.

Anna did this hairstyle.  She added a ribbon.  This ribbon was too short, so she bobby pinned it on instead of tying it around the bun.

2.  Side Ponytail

The next quicky is the side ponytail.  We do this one a lot.  You start by brushing all of the hair on the opposite side of the part a little above and behind the ear.  Smooth and hair spray as you go.
Use a hair band to make the ponytail.


 After the elastic is secure, then add a flower, bow or ribbon.  With the flower we usually put it more on the top front of the hair band.  I really was in a hurry on this one hence the unmatching hair band.

3.  Side Floppy Bun

 To make it cuter, dressier or more finished, we do a loop with the first half of the hair.  This is done after the first two twists of the hair band.  Then on the third one, or second depending on how thick your child's hair is, just go half way and don't pull all of the hair through. 
 Then take the hanging hair and loop it up, not under and connect it to the hair band with the ends tucked inside the loop.  Because my children have pretty long hair, I usually loop the ends up around into a third bun. 


      This ends up looking nice without a lot of effort.  So, if you see Livvy with this hairstyle a lot, you know I'm busy.  Side pony tails are way faster than regular with long hair because they have less bumps to start with.

Wednesday, August 6, 2014

Hair History

.

 To start off I wanted to tell you a little bit about my hair history.  I was born with naturally curly hair, which is another word for challenging. I grew up in a family of 10 kids with 7 girls.  I don't really remember my hair being done except the dreaded wetting it down with water that always made my eyes water, so easy hairdos were the norm.  When I was a teenager, I learned how to braid.  Of all my sisters, I have the least fashion sense.  It's true, but I do know how to braid, so I did the most hair.  Over the years I have run into people that have helped me figure our what works and what doesn't.  I still feel like the biggest copier on the planet.  So, I would like to do a hair blog, just to practice ideas and to record them.  Then I can remember what we did and how.
 The first hairdo I learned was the grab, rubber band, and put a bow on it.  I had a friend who was a beautician.  She got so sick of Katelyn's wild hair, that one day she just did it right in front of me.  She had had it.  I personally loved the natural look.  She was so cute with her curly, white blond, wild hair.  My friend couldn't take it.  It was a breakthrough for me.  From then on I knew how to do the grab some hair on top, rubber band it,  then slap a bow on it. 
Every child wore this hair-do.  It was a winner in my book.  It especially works with short hair.
  I stuck with this one for a long time.  It is still a favorite, and easy which is the key.  But since I have a few teenagers who braid, we have branched out. We do so much hair in our family that we need a reminder now and then.  I forget what we did and sometimes don't get back to it for months.
I would like to invite you to give me any tips that you have discovered.  It may be the simplest thing, but may make all the difference.  Then I will have it in my blog forever.